
Streamline the install for your users
For simplicity, an Exchange Administrator can enable the Jiminny meeting scheduler add-in for all users or a select group. It is not yet possible to install via Centralized Deployment.
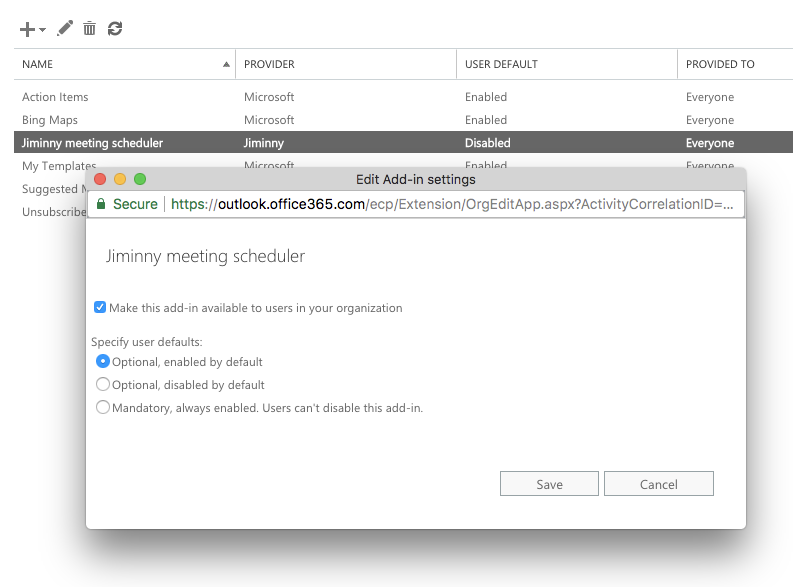
Install for All Users
- Visit the Exchange Admin Center;
- Under Organization > add-ins click the ➕ icon;
- Click Add from URL;
- In the pop-up, type: https://outlook.jiminny.com/manifest.xml and click Install;
- Highlight the row that the add-in is located in and click the ✏ (pen) icon to edit;
- Set the User Defaults to Optional, enabled by default and click Save.
Now all the users in the organization have the add-in installed. Once they restart Outlook or reload Outlook Web Access, they will see the Jiminny add-in.
Install for Some Users
Installing the add-in for a subset of your users is more complex. You'll need to setup a Distribution List for them in Exchange, then connect to Exchange Online PowerShell. Refer to Manage User Access To Add-Ins For Outlook (section Limit Availability To Specific Users) and the Set-App Mailbox Cmdlet for instructions.
Note: There are typos in the Manage User Access To Add-Ins For Outlook document provided by Microsoft. Every instance of "Organizationadd-in" should actually be "OrganizationApp". See the Set-App Mailbox Cmdlet document for correct examples!
Installing Individually
An individual user can install the add-in for themselves. It will only affect their account, not other users in the organization. For instructions please refer to the separate guide.
Note: the add-in will soon be available in the Microsoft Store for easier installation!